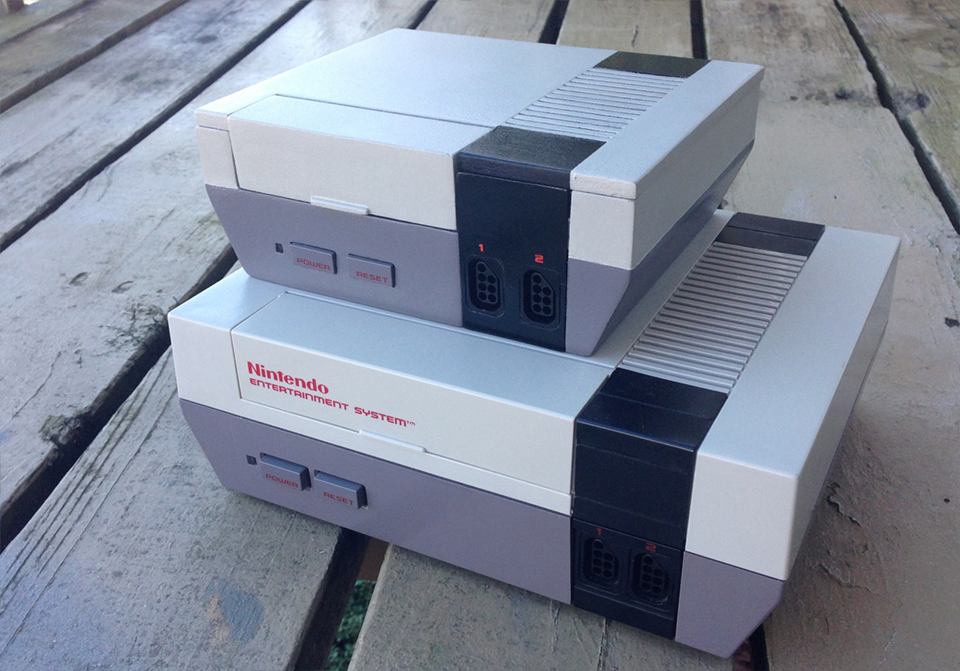
This Mini NES project was the result of a desire to build a more portable console that would allow me to play most of my retro games while still maintaining the authenticity of playing on the original system.
As a video game collector and enthusiast, storage becomes an issue. Your collection outgrows shelf space and taking your library of games on the go will be limited to only a handful of games. While other similar projects resulted in using the default USB ports standard with the Raspberry Pi, I was looking to retain the original controller as a part of the authenticity and experience of playing the original console in miniature form.
The first step was to determine the size of the enclosure. The case would have to comfortably fit the Raspberry Pi, wiring, original controller ports and buttons, LED lights as well as other electronic components. Based on measurements, I drew a schematic of what I felt were suitable dimensions while considering how the top would detach in order to have easy access to the wiring.
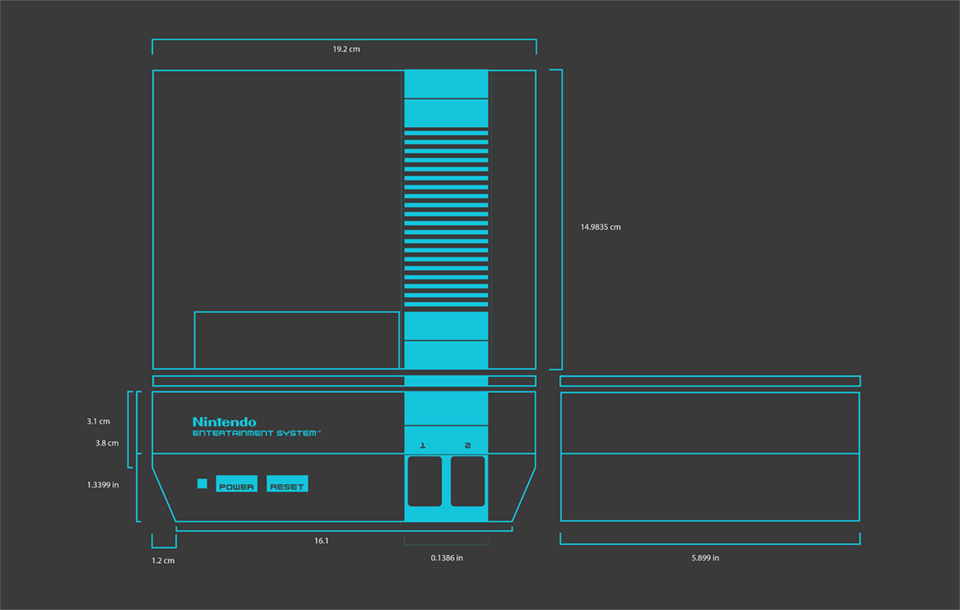
Measurements
I cut out a prototype out of foam board to get a sense of the space for the additional wiring, boards and cables.
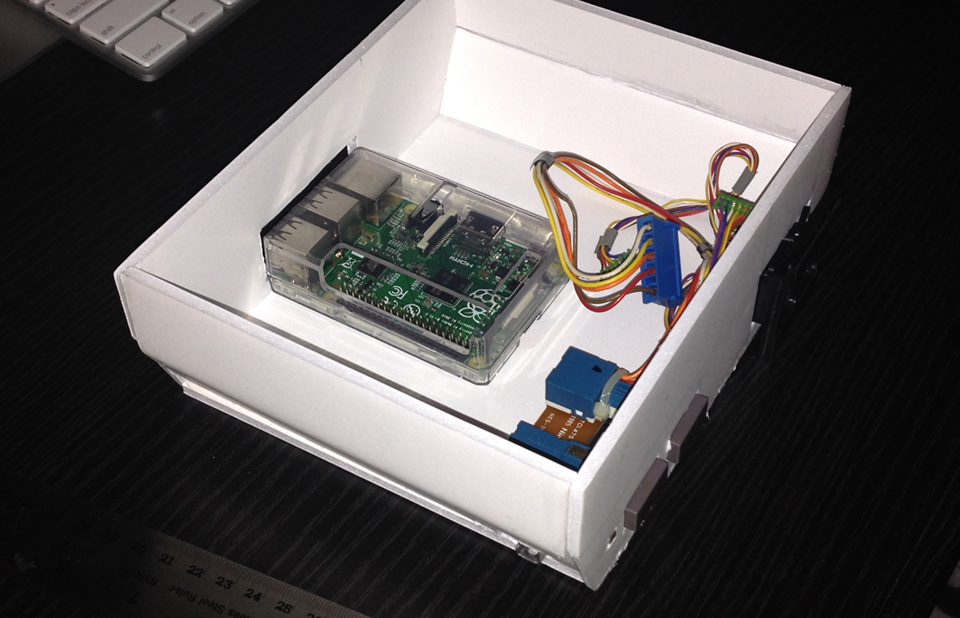
Prototype
When choosing a material for this project, I reflected on different finishes such as basswood or plastic. I decided to settle with with pinewood instead as its low density made it a more versatile material, allowing for easy drilling and sanding. It is very flexible yet sturdy enough to hold its form as well as accept color very well when painting.
Next step was to find matching colors for the top and bottom case of the NES. A friendly employee at Lowe’s who was very interested in my project plans, helped me mix the right acrylic colors that closely matched those of the original console.
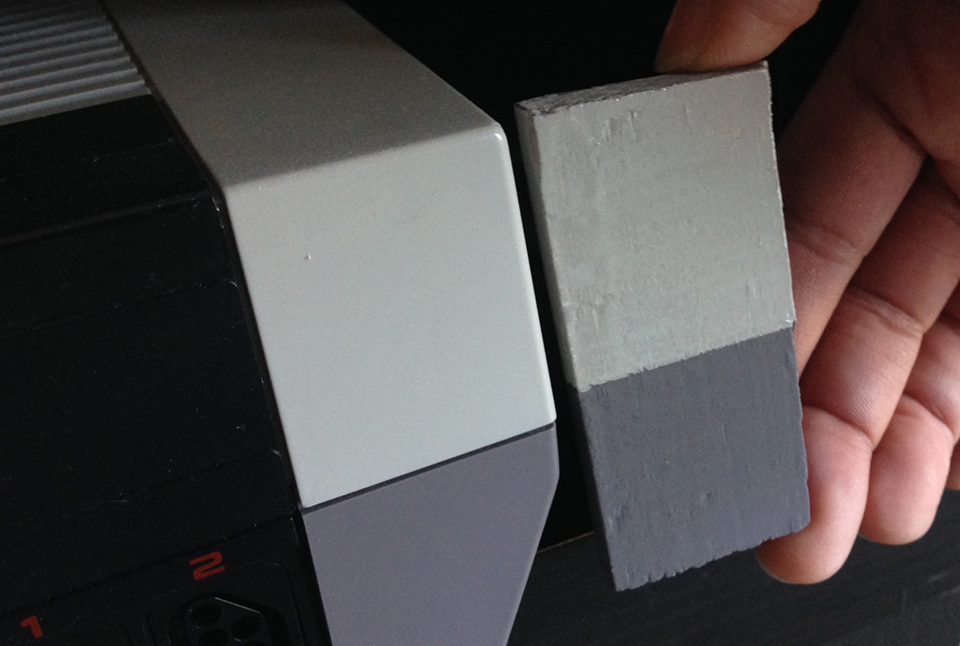
Color Matching
Using pencil to outline the faces of the box on the pinewood, I employed the help of my friend John to cut out the parts using his table saw. I sanded down all of the pieces in order to achieve a smooth surface and glued them using basic carpenter’s glue. The challenging part was hand-drilling out the holes for the buttons and controller ports using a Dremel to achieve an accurate fit.
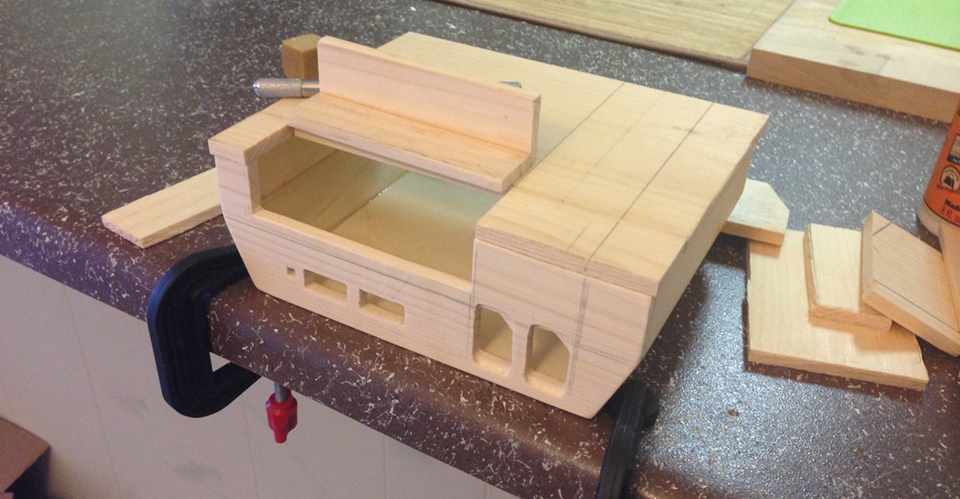
Woodwork
Sanding for a smooth surface and priming was essential before adding paint.
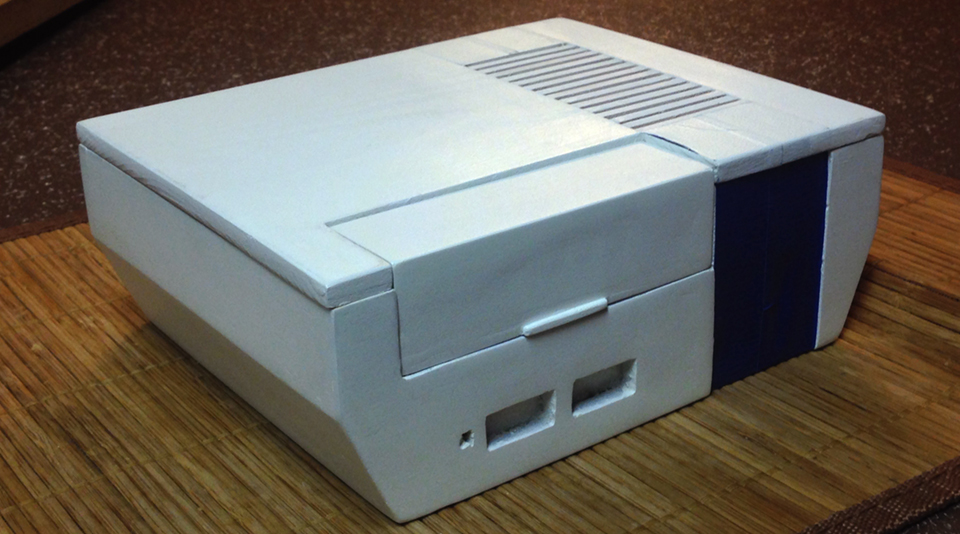
Priming
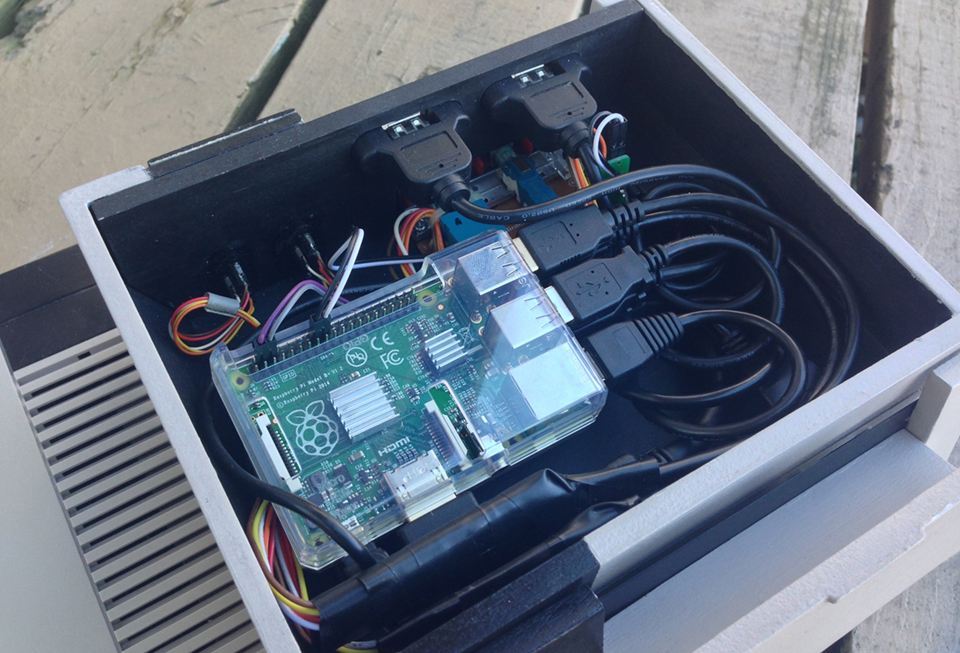
After finishing off the paint job with a matted black for a more aesthetic interior, I began to wire the power and reset buttons to the GPIO pins of the Raspberry Pi. I soldered the NES to USB adaptor boards and the power switch and LED light. All of the respective ports were connected to the back of the enclosure. Lastly, the title and labels were added using a transfer liquid and a laser printout.
Wiring
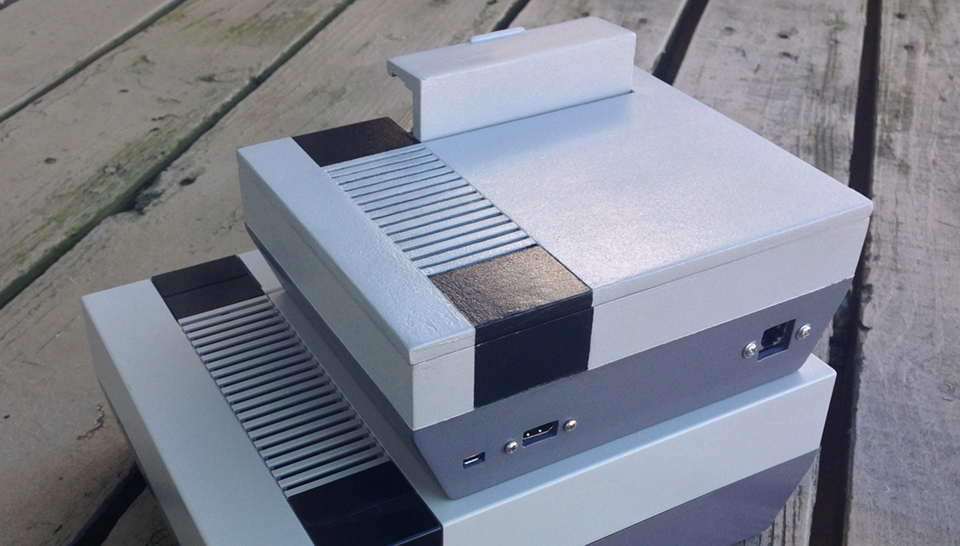
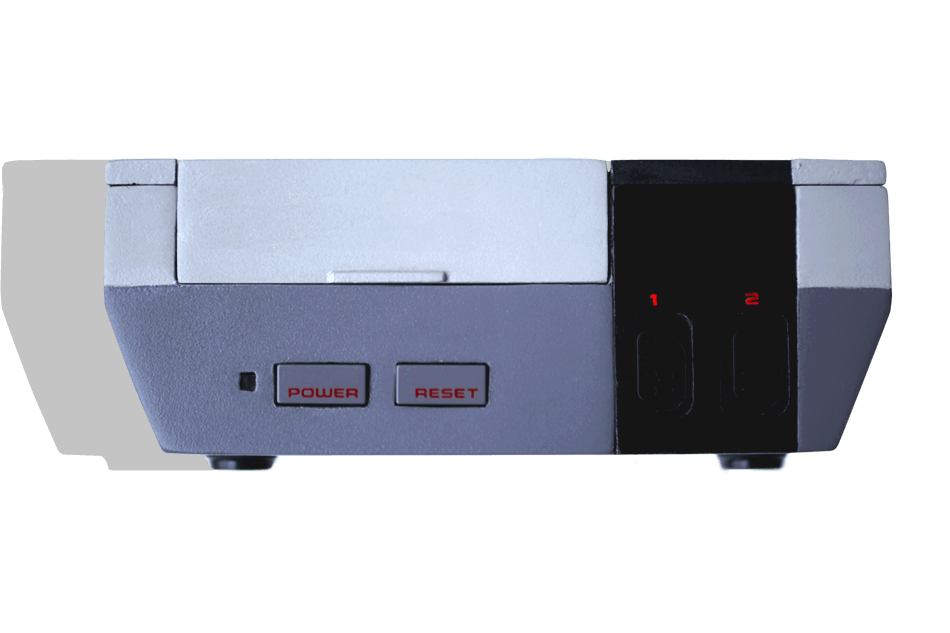
Back of the unit
While it was a laborious process, I was very satisfied with the outcome and bringing new life to an iconic console in a new way. It’s a labor of love reflecting my enthusiasm for video games and a homage to an influential console that defined part of my childhood.
If you are interested in learning how to wire your own, check out this video tutorial on YouTube.
Front of the unit
HOMEDesigned at Jackson Marketing Group.